In this blog, we will provide a comprehensive guide on how Homepod mini wall mount installation works, as well as recommend some of the best accessories to enhance your experience.
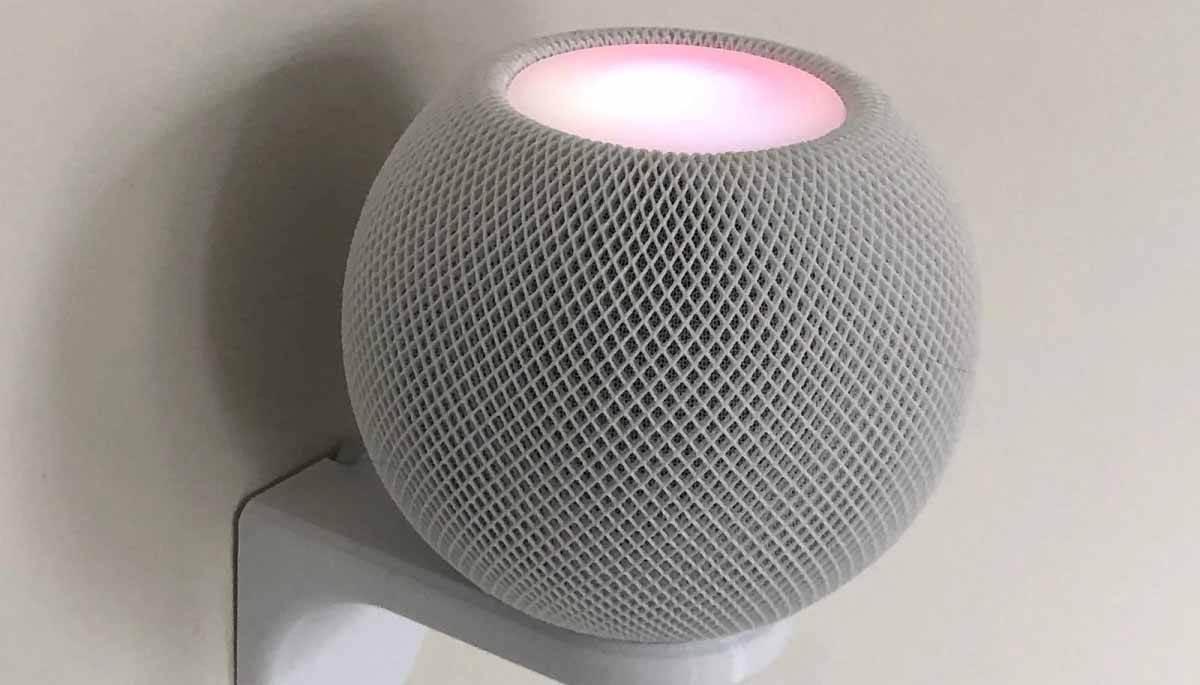
Those who are not aware of this, the Homepod mini is a compact and powerful smart speaker that can easily be mounted on a wall to save space and add a modern touch to your home.With proper installation process, you can enhance its look and get more benefits.
It’s a great addition to any home entertainment setup, and with its sleek design, it can easily blend into your home decor. But if you want to make the most of your Homepod mini, you may want to consider mounting it on a wall.
Homepod mini wall installation – Prerequisites
Mounting your Homepod mini on a wall not only saves space, but it also makes it easier to control and access your music and smart home devices. Plus, it looks more aesthetically pleasing when it’s not taking up valuable tabletop space.
But before you start drilling holes in your wall, it’s important to plan ahead and gather all the necessary tools and accessories. Here’s a list of what you’ll need:
- A wall mount,
- A drill,
- Screws,
- A level,
- A tape measure, and
- A screwdriver.
It is important to note that the Homepod mini is not designed to be mounted on a wall out of the box, so a best Homepod mini wall mount is required so you can get better look and it is available in your reach.
In addition to these basic tools, you’ll also need a durable wall mount for your Homepod mini. There are a few options available, so choose one that fits your needs and budget. Here are some of the best wall mounts for the Homepod mini:
- Homepod Mini Wall Mount by ElevationLab: This mount is made of sturdy aluminum and uses a unique hinge design to securely hold your Homepod mini in place. It’s also adjustable, so you can tilt and swivel the speaker to your desired angle.
- Homepod Mini Wall Mount by TotalMount: This mount is made of high-quality plastic and uses a simple yet effective design to hold your Homepod mini securely on the wall. It’s also easy to install and comes with all the necessary mounting hardware.
- Homepod Mini Wall Mount by HUANUO: This mount is made of durable ABS plastic and has a simple yet effective design to hold your Homepod mini in place. It’s easy to install and comes with all the necessary mounting hardware.
Homepod mini wall mount – Step-By-Step Guide
Once you have gathered all of the necessary materials, it’s time to start the installation process. If anything, you missed the just arrange it. Now here are the steps that you need to follow for proper wall mount:
- Choose the location for the wall mount: The first step is to choose the location for the wall mount. It is important to consider the location of outlets, as the Homepod mini needs to be plugged in for power. It is also important to consider the location of other smart home devices, as the Homepod mini can be used to control these devices through voice commands.
- Measure and mark the mounting holes: Next, you will need to measure and mark the mounting holes on the wall. The wall mount should come with a template that shows the placement of the holes. Use a tape measure to ensure that the holes are evenly spaced and level.
- Drill the mounting holes: Once you have marked the holes, it’s time to drill them. Use a drill and the appropriate drill bit to make the holes. Make sure to drill straight into the wall to ensure a secure mount.
- Attach the wall mount: Once the holes are drilled, it’s time to attach the wall mount. Follow the instructions provided with the wall mount to attach it to the wall using the screws provided.
- Mount the Homepod mini: Once the wall mount is securely attached to the wall, you can mount the Homepod mini onto it. Simply slide the Homepod mini into the wall mount and secure it in place.
- Connect the power cord: Finally, connect the power cord to the Homepod mini and plug it into an outlet. The Homepod mini will automatically turn on and be ready to use.
Homepod mini accessories to enhance experience
Now that you know how to mount the Homepod mini on a wall, here are some recommended accessories to enhance your experience. These are the optional, but its up to you if you would like to improve the look and feel of your room then proceed with below given options:
- Wall plate cover: A wall plate cover can help to hide any unsightly wires and create a sleek and modern look for your Homepod mini setup.
- Power strip with USB ports: If you don’t have an outlet nearby for the Homepod mini, a power strip with USB ports can be a convenient solution. This will allow you to plug the Homepod mini into a nearby power strip and easily control it with a smart plug.
- Wall mount bracket: If you want to mount the Homepod mini on a wall but don’t have a wall mount specifically designed for it, a wall mount bracket can be a good alternative. These brackets can hold a variety of smart speakers and can be easily mounted to a wall.
- Decorative shelf: If you want to display your Homepod mini in a more decorative way, a decorative shelf can be a great accessory. These shelves can be mounted to a wall and provide a stylish way to showcase your Homepod mini while keeping it out of the way.
Overall, mounting the Homepod mini on a wall is a simple and effective way to save space and add a modern touch to your home. With the proper Homepod mini wall mount guide you can even make the whole process very simple and also enhance the room experience!